Maximizing Your Reach: Top Video Marketing Strategies for YouTube

With billions of active users, YouTube is a fantastic destination for your social media marketing campaign. Most brands target the YouTube audience by creating high-quality videos. YouTube video marketing is effective for increasing brand awareness and improving product discovery. However, your competitors are also using the same platform to run their video marketing programs. So, how will you maximize your reach and stay in front of the target audience? A few simple tips will make your marketing campaign successful.

Create a strategy for YouTube marketing

A standard YouTube video marketing strategy involves different methods:

  • You can simply create your video and upload it on the platform to engage your audience.
  • Some brands work with social media influencers to make their videos visible to more people.
  • Another option is the YouTube advertising campaign for your brand, and video marketing services can help with this. Video ads will deliver higher returns on your investment.

How to increase your reach – Learn video marketing tactics

There are some ways to boost your reach with YouTube marketing:

Optimize your YouTube videos

Optimized videos appear at the top position in the search results. The best YouTube SEO practices involve writing keyword-rich descriptions and titles. Make sure you have chosen categories to help your audience have a better understanding of the content. Professional marketers recommend adding tags to the videos to provide YouTube with more content-related context.

Identify your audience’s needs

Before producing your video content, you should understand your target audiences. What type of videos do they prefer? You may also check the videos that have attracted a lot of views. Use a competitive analysis tool to learn about your competitors’ videos. Set YouTube marketing metrics (such as followers and engagement) to measure your campaign’s performance.

Ask viewers to like and comment

You may directly ask your viewers to comment on the content and like the video. Not every viewer enjoys a particular video. However, those feeling interested in the content will become your subscriber.

You can also talk about the upcoming videos and keep the audience engaged with your channel. You may add a link to your website as a type of call-to-action.

Never overlook YouTube Shorts

Most brands focus on creating only long videos. But, YouTube Shorts is a special allowing you to upload short videos. Edit the videos with tools like speed controls. The short content will help you reach a wider YouTube audience. As it appears on the homepage, your target viewers can easily discover it. Also, you may share it on other social platforms.

Live stream your videos

Many social media users like to watch real-time video content. So, you can leverage the YouTube Live feature to host webinars or show product demos. Live tutorials are also valuable to some audiences, who want to solve problems.

To spread brand awareness, you can invest in video marketing services. YouTube marketing experts implement the right strategies for promoting your brand. They will make your videos reachable to the audience across different platforms. Rely on professionals to optimize your videos.
How to Record Quality Audio with Video for Students

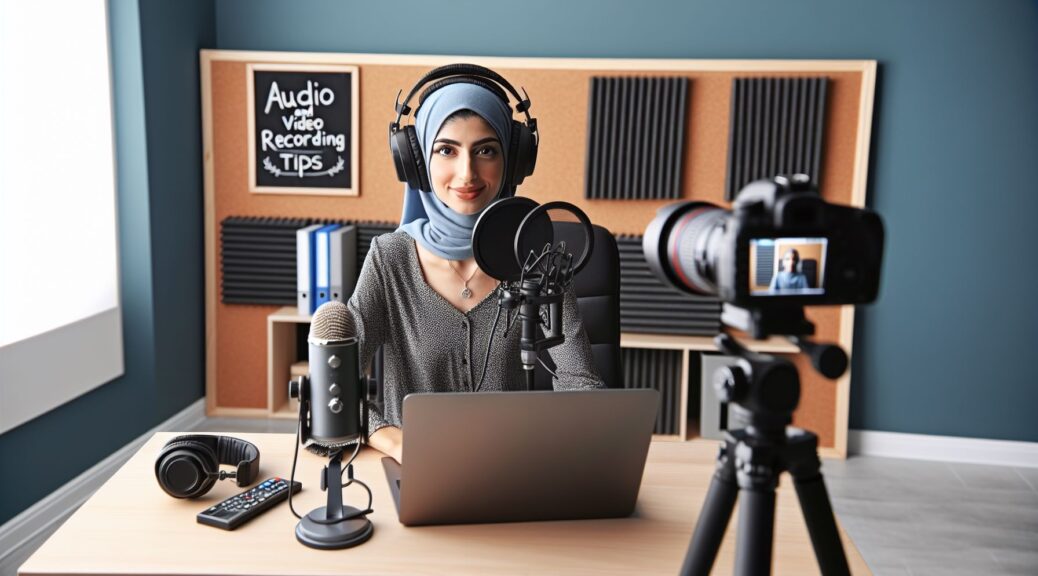
Recording video content is an essential skill for students in today’s digital age. Whether you’re creating a presentation for a class project or filming a tutorial for a school assignment, capturing high-quality audio is just as important as the visuals. Poor audio quality can detract from the overall message of your video and make it difficult for viewers to engage with your content. In this guide, we’ll explore some tips and techniques for recording quality audio with video to help you produce professional-looking and sounding videos.

Introduction

Before we dive into the specifics of recording quality audio with video, it’s important to understand the basics of sound capture. When recording video, the built-in microphone on your camera or smartphone may not always provide the best audio quality. To ensure that your video has clear and crisp sound, it’s essential to use an external microphone. There are several types of microphones available, including shotgun mics, lapel mics, and USB mics, each with its own strengths and weaknesses.

Body

1. Choose the Right Microphone

When selecting a microphone for recording video, consider the environment in which you’ll be filming. If you’re shooting outdoors or in a noisy location, a shotgun microphone may be the best option, as it can help to isolate sound and reduce background noise. For indoor filming or interviews, a lapel microphone may be more suitable, as it can capture clear audio from the subject’s voice without picking up other ambient sounds.

2. Position the Microphone Properly

Once you’ve chosen the right microphone for your video, it’s crucial to position it correctly for optimal audio quality. For a shotgun microphone, aim it towards the sound source, keeping it at a distance of approximately 1-2 feet away. For a lapel microphone, clip it onto the subject’s clothing near their mouth to ensure clear and consistent sound capture.

3. Monitor Audio Levels

Before you begin recording your video, take the time to test the audio levels to ensure that the sound is not too loud or too quiet. Most cameras and smartphones have built-in audio meters that indicate the volume of the sound being recorded. Aim to keep the audio levels in the green range to prevent distortion and ensure that your audio is clear and balanced.

4. Use a Pop Filter

When recording audio with video, it’s essential to minimize unwanted noise and ensure that speech sounds clear and natural. A pop filter can help to reduce plosive sounds (like “p” and “b”) and limit the impact of wind noise on your audio. Place the pop filter in front of the microphone to capture clean and crisp sound without distortion.

Conclusion

Recording quality audio with video is a fundamental skill for students looking to create professional-looking and sounding content. By choosing the right microphone, positioning it properly, monitoring audio levels, and using a pop filter, you can ensure that your video has clear and crisp sound. Remember, high-quality audio is just as important as the visuals in your video, so take the time to invest in the right equipment and techniques for capturing professional-grade sound. With these tips and techniques in mind, you’ll be well on your way to producing engaging and informative videos that will capture the attention of your audience.

How to Create Video for Facebook for Small Business Owners

In today’s digital age, creating video content is essential for small business owners looking to engage with their audience on social media platforms like Facebook. Video has been proven to be one of the most effective ways to capture attention and convey information in a memorable way. If you’re a small business owner looking to create video content for Facebook, here are some tips to help you get started.

Introduction to Video Creation for Facebook

Before diving into the process of creating video content for Facebook, it’s important to understand the benefits of using video as a marketing tool. Video is a versatile medium that can be used to showcase products, share behind-the-scenes glimpses of your business, or provide valuable information to your audience. With the ability to reach a large audience and generate engagement, video content can help you stand out in a crowded online marketplace.

Planning Your Video Content

Before you start creating your video, it’s important to have a clear plan in place. Consider the message you want to convey, the target audience you want to reach, and the goals you want to achieve with your video. Are you looking to promote a new product, share a customer testimonial, or provide a tutorial on how to use your services? By defining your objectives upfront, you can create a video that is tailored to your audience and focused on driving results.

Filming Your Video

When it comes to filming your video, there are a few key things to keep in mind. Make sure you have good lighting to ensure your video looks professional and engaging. Consider using a tripod to keep your shots steady and avoid shaky footage. Use a high-quality camera or smartphone to capture clear images and crisp sound. And don’t forget to rehearse your script and practice your delivery to ensure a polished final product.

Editing and Post-Production

Once you’ve filmed your video, it’s time to move on to the editing and post-production phase. Editing software like Adobe Premiere Pro or iMovie can help you trim your footage, add transitions, overlay text, and include music or sound effects to enhance your video. Don’t be afraid to experiment with different editing techniques to find the style that best suits your brand and message.

Optimizing Your Video for Facebook

Before you upload your video to Facebook, consider optimizing it for the platform. Keep your video short and to the point to capture viewers’ attention quickly. Add captions or subtitles to make your video accessible to a wider audience. And don’t forget to add a compelling thumbnail and engaging copy to entice viewers to click and watch your video. By taking the time to optimize your video for Facebook, you can increase its visibility and reach more potential customers.

Conclusion

Creating video content for Facebook can be a powerful way for small business owners to connect with their audience, showcase their products and services, and drive engagement. By following these tips for planning, filming, editing, and optimizing your video content, you can create compelling videos that resonate with your target audience and help you achieve your business goals. So why wait? Start creating video content for Facebook today and watch your online presence grow.

How to Use a Green Screen for Podcasters

Green screens have long been a staple in the world of film and television production, but they can also be incredibly useful for podcasters looking to take their content to the next level. By using a green screen, podcasters can create visually compelling backgrounds that enhance the overall production value of their videos. In this guide, we will walk you through the process of using a green screen for podcasting, from set-up to editing.

Setting Up Your Green Screen

The first step in using a green screen for podcasting is setting it up properly. Make sure you have a large enough space to set up your green screen without any wrinkles or creases. Position your green screen behind where you will be sitting during your podcast recording. Make sure the lighting in the room is even and that there are no shadows cast on the green screen.

Choosing Your Background

Once your green screen is set up, you can choose the background you want to use for your podcast. This could be a static image, a video loop, or even a live feed from another camera. The key is to choose a background that complements your content without being too distracting.

Recording Your Podcast

When you start recording your podcast, make sure to position yourself in front of the green screen and ensure that your lighting is consistent. This will make it easier to key out the green screen in post-production. Speak clearly and confidently, and remember to engage with your audience as if they were sitting right in front of you.

Editing Your Podcast

Once you have finished recording your podcast, it’s time to edit the footage. This is where the magic of the green screen comes into play. Using editing software such as Adobe Premiere or Final Cut Pro, you can key out the green screen and replace it with the background of your choice. Make sure to adjust the settings to ensure a clean key, and consider adding additional elements such as graphics or animations to enhance your video.

Tips for Using a Green Screen

  • Make sure to wear clothing that doesn’t clash with the green screen, as this can cause issues with the keying process.
  • Experiment with different backgrounds to see what works best for your content.
  • Consider investing in a high-quality green screen and lighting setup to achieve professional-looking results.
  • Practice proper lighting techniques to ensure a clean key and professional-looking final product.

Conclusion

Using a green screen for podcasting can take your content to the next level by adding visually compelling backgrounds that enhance the overall production value of your videos. By following the steps outlined in this guide, you can create professional-looking podcasts that engage your audience and elevate your brand. So don’t be afraid to experiment with green screens in your podcasting endeavors – the results may surprise you!

Easy Ways to Produce Video Content for Small Business Owners

In today’s digital age, video content has become more important than ever for small business owners looking to engage with their audience and drive results. Whether you’re hoping to showcase your products, share behind-the-scenes footage, or provide valuable tips and tutorials, creating videos can be a powerful way to connect with your customers and build brand awareness.

However, many small business owners may feel intimidated by the idea of producing video content, assuming it requires expensive equipment and technical expertise. The good news is, there are plenty of easy and affordable ways to create professional-looking videos that can help you achieve your business goals.

1. Use Your Smartphone

One of the simplest ways to create video content for your business is by using your smartphone. Most modern smartphones have high-quality cameras that are more than capable of capturing crisp, clear footage. Experiment with different angles, lighting, and settings to find what works best for your videos.

You can also invest in a few inexpensive accessories, such as a tripod or a clip-on microphone, to enhance the quality of your videos. Apps like iMovie or Adobe Premiere Rush can help you edit your footage and add music and graphics to create a polished final product.

2. Repurpose Existing Content

If you’re feeling stuck for ideas, consider repurposing existing content from your website or social media channels into video format. For example, you could turn a blog post into a short video series, create a video version of a customer testimonial, or showcase a product demo in action.

Repurposing content not only saves you time and effort, but it also helps you reach a new audience and reinforce your brand messaging across different platforms.

3. Collaborate with Influencers

Another effective way to create video content for your business is by collaborating with influencers in your industry. Influencers already have a built-in audience that trusts their recommendations, making them valuable partners for promoting your products or services.

Reach out to influencers who align with your brand values and target audience, and propose a collaboration that benefits both parties. This could involve creating sponsored content, hosting a giveaway, or co-hosting a live video event.

4. Host Live Q&A Sessions

Hosting live Q&A sessions on platforms like Instagram Live or Facebook Live is a great way to engage with your audience in real-time and showcase the human side of your business. Encourage followers to submit questions in advance or during the broadcast, and be prepared to provide helpful and informative answers.

Not only do live Q&A sessions create a sense of transparency and authenticity, but they also help you establish yourself as an expert in your field and build trust with your audience.

Conclusion

Creating video content for your small business doesn’t have to be complicated or costly. By using simple tools like your smartphone, repurposing existing content, collaborating with influencers, and hosting live Q&A sessions, you can effectively connect with your audience and drive results for your business.

Remember to keep your videos concise, engaging, and on-brand, and don’t be afraid to experiment with different formats and styles. With a bit of creativity and effort, you can leverage the power of video content to take your business to the next level.

A Guide to Creating Compelling Videos for YouTube

In today’s digital age, video content has become one of the most powerful forms of communication. As a videographer looking to make an impact on YouTube, it’s crucial to understand how to create videos that captivate your audience and keep them coming back for more. From planning and shooting to editing and promoting, every step in the process plays a key role in the success of your video. In this guide, we’ll walk you through the essential steps to creating compelling videos for YouTube.

Step 1: Planning Your Video

Before you start filming, it’s important to have a clear plan in mind for your video. Define your target audience, figure out your objective, and outline the key messages you want to convey. Consider the length of your video, the filming location, and any props or equipment you may need. A well-thought-out plan will help you stay focused and ensure that your video delivers a strong message to viewers.

Step 2: Filming Your Video

When it comes to filming, pay attention to the quality of your shots. Use a tripod to keep your footage stable and invest in good lighting to ensure that your subjects are clearly visible. Experiment with different angles and perspectives to make your video visually engaging. Don’t forget about audio quality – use a microphone to capture clear sound and eliminate any background noise. Lastly, remember to shoot more footage than you think you need – having extra footage will give you more options during the editing process.

Step 3: Editing Your Video

Editing is where the magic happens. Use editing software to piece together your footage, add transitions, text overlays, and music to enhance the viewing experience. Pay attention to pacing – keep your video engaging by cutting out any unnecessary footage and maintaining a good flow. Color correction and audio adjustments can also make a big difference in the overall quality of your video. Don’t be afraid to experiment with different editing techniques to find a style that suits your content.

Step 4: Promoting Your Video

Once your video is ready, it’s time to promote it to reach a wider audience. Create an eye-catching thumbnail and write a compelling title and description to attract viewers. Share your video on social media platforms, collaborate with other YouTubers, and engage with your audience through comments and feedback. Consistency is key – keep creating and sharing quality content to build a loyal following on YouTube.

Conclusion

Creating compelling videos for YouTube requires careful planning, attention to detail, and a creative mindset. By following the steps outlined in this guide, you can produce high-quality videos that resonate with your audience and help you stand out in the competitive world of online video content. Remember, practice makes perfect – keep honing your skills, experimenting with new ideas, and pushing the boundaries of your creativity to create videos that truly wow your viewers.

How to Create Professional Video Content for Facebook as a Blogger

In today’s digital age, video content has become a powerful tool for bloggers to engage with their audience and grow their online presence. With Facebook being one of the most popular platforms for sharing video content, it’s essential for bloggers to create high-quality videos that will capture the attention of their followers. In this article, we will discuss how bloggers can create professional video content for Facebook that will help them stand out in the crowded social media landscape.

The Importance of Video Content for Bloggers

As a blogger, you may already be familiar with the importance of creating high-quality written content for your blog. However, incorporating video content into your content strategy can take your blog to the next level. Video content is more engaging and interactive than written content, making it more likely to be shared and viewed by a larger audience.

According to research, video content on Facebook receives up to 8 billion views per day, making it a powerful platform for bloggers to reach a large audience. By creating professional video content for Facebook, bloggers can increase brand awareness, engagement, and ultimately drive more traffic to their blogs.

Planning Your Video Content

Before you start creating your video content, it’s essential to have a clear plan in place. Start by defining the goal of your video – whether it’s to introduce a new blog post, share a tutorial, or engage with your audience in a more personal way. Next, outline the key points you want to cover in your video and create a script to guide your content.

Consider the length of your video – shorter videos (1-2 minutes) tend to perform better on Facebook as they capture viewers’ attention quickly. Decide on the tone and style of your video – whether it’s informational, inspirational, or entertaining – and make sure it aligns with your brand and target audience.

Production Process

Once you have a clear plan in place, it’s time to start the production process. Invest in a good quality camera or smartphone with a high-quality video recording capability. Make sure you have good lighting and audio equipment to ensure your video looks and sounds professional.

Consider using a tripod to stabilize your camera and create smooth, professional-looking shots. Be mindful of your background – choose a clean, clutter-free backdrop that won’t distract from your message. Remember to dress appropriately and consider your body language and facial expressions as they can make a big difference in how your video is perceived by viewers.

Editing Your Video

After recording your video, it’s time to edit and polish your content. There are many video editing tools available to help you create professional-looking videos, such as Adobe Premiere Pro, Final Cut Pro, or iMovie. Use these tools to trim your video, add transitions, text overlays, and music to enhance your content.

Consider adding captions to your video to make it accessible to viewers who may be watching without sound. Add your logo or watermark to ensure your branding is consistent across all your video content. Remember to keep your video concise and engaging – grab viewers’ attention from the start and keep them interested until the end.

Uploading and Promoting Your Video

Once your video is edited and polished, it’s time to upload it to Facebook. Write a compelling caption that captures the essence of your video and encourages viewers to watch. Consider boosting your video post to reach a larger audience or sharing it in relevant Facebook groups or on your blog.

Engage with your audience by responding to comments and messages related to your video. Monitor the performance of your video using Facebook Insights and adjust your content strategy accordingly. Continue to create high-quality video content for Facebook to keep your audience engaged and grow your online presence as a blogger.

Conclusion

Creating professional video content for Facebook as a blogger may seem daunting at first, but with careful planning and the right tools, you can create engaging and impactful videos that will help you reach a larger audience and grow your online presence. By following the tips outlined in this article, you can create high-quality video content that will stand out in the crowded social media landscape and help you achieve your blogging goals. Start creating video content for Facebook today and watch your blog soar to new heights!

The Best Video Editing Software for Business Owners

Video content has become an essential tool for businesses looking to engage with their audience and market their products or services effectively. As a business owner, creating professional-quality videos can help you showcase your brand, connect with your target audience, and increase your online presence. However, with a plethora of video editing software available in the market, it can be challenging to determine which one is the best fit for your business needs. In this article, we will explore some of the best video editing software options for business owners.

Adobe Premiere Pro

Adobe Premiere Pro is a popular choice among professional videographers and business owners alike. This software offers a wide range of features, including advanced editing tools, intuitive interface, and seamless integration with other Adobe products. With Adobe Premiere Pro, you can create high-quality videos with customizable effects, transitions, and audio enhancements. Additionally, its cloud-based tools and mobile apps allow you to edit videos on the go, making it a convenient option for busy business owners.

Final Cut Pro X

Final Cut Pro X is another top video editing software that is widely used by business owners and content creators. This software is known for its user-friendly interface, powerful editing tools, and seamless integration with Apple products. With Final Cut Pro X, you can create professional-looking videos with ease, thanks to its intuitive timeline editor, advanced color grading tools, and built-in effects. Additionally, Final Cut Pro X offers high-performance editing capabilities, making it a great choice for businesses looking to create visually stunning videos.

Camtasia

Camtasia is a versatile video editing software that is ideal for business owners looking to create instructional videos, tutorials, or promotional content. This software offers a range of features, including screen recording, video editing, and animation tools, making it a one-stop solution for all your video editing needs. With Camtasia, you can easily record your screen, edit videos, and add interactive elements to engage your audience effectively. Additionally, Camtasia’s user-friendly interface and extensive library of assets make it a great choice for businesses looking to create professional-quality videos without a steep learning curve.

iMovie

If you are a business owner using a Mac or iOS device, iMovie is an excellent video editing software option for you. iMovie offers a simple and intuitive interface, making it easy for beginners to create professional-looking videos. With iMovie, you can edit videos, add transitions, effects, and music, and share your creations directly to social media platforms. Additionally, iMovie’s built-in templates and themes make it easy to create polished videos in a matter of minutes, making it a great choice for businesses looking to create quick and effective video content.

In conclusion, choosing the right video editing software for your business is essential to creating high-quality videos that engage your audience and drive results. Whether you are looking for advanced editing tools, user-friendly interface, or seamless integration with other products, there are a variety of video editing software options available to suit your business needs. By exploring the features and benefits of different video editing software options, you can find the best fit for your business and create professional-quality videos that help you showcase your brand and connect with your audience effectively.

Best Microphones for Podcasting for Business Owners

As a business owner, podcasting can be a powerful tool to increase brand awareness, engage with your audience, and establish yourself as a thought leader in your industry. However, in order to produce high-quality podcasts, you need the right equipment, with one of the most important being a good microphone. The microphone you choose can make a big difference in the sound quality of your podcast, so it’s crucial to invest in a microphone that fits your needs and budget. In this article, we’ll explore some of the best microphones for podcasting for business owners.

Introduction to Microphones for Podcasting

When it comes to microphones for podcasting, there are two main types to consider: USB microphones and XLR microphones. USB microphones are plug-and-play, meaning you can simply plug them into your computer and start recording. They are great for beginners and those who are looking for a simple setup. On the other hand, XLR microphones require an audio interface or mixer to connect to your computer, but they offer more control over your sound and can provide better audio quality.

Best Microphones for Podcasting

  1. Blue Yeti USB Microphone
    The Blue Yeti is a popular choice among podcasters due to its affordability and versatility. It offers multiple pickup patterns, allowing you to adjust the directionality of the microphone based on your recording environment. The Blue Yeti also features a built-in headphone jack for real-time monitoring and a gain control knob for adjusting the microphone sensitivity.

Blue Yeti USB Microphone

  1. Audio-Technica AT2020 XLR Microphone
    The Audio-Technica AT2020 is a budget-friendly XLR microphone that delivers professional sound quality. It features a cardioid pickup pattern, which is ideal for isolating your voice from background noise. The AT2020 also has a low-mass diaphragm for extended frequency response and superior transient response.

Audio-Technica AT2020 XLR Microphone

  1. Rode Podcaster USB Microphone
    The Rode Podcaster is a dynamic USB microphone specifically designed for podcasting. It has a tight cardioid pickup pattern to capture your voice with clarity and reject unwanted noise. The Podcaster also features a built-in pop filter to reduce plosives and a 3.5mm headphone output for monitoring.

Rode Podcaster USB Microphone

  1. Shure SM7B XLR Microphone
    The Shure SM7B is a professional-grade XLR microphone that is commonly used in radio stations and recording studios. It has a flat, wide-range frequency response for natural sound reproduction and a cardioid pickup pattern for excellent off-axis rejection. The SM7B also has a built-in air suspension shock isolation system to minimize vibrations and mechanical noise.

Shure SM7B XLR Microphone

Conclusion

Choosing the right microphone for your podcasting needs is crucial to producing high-quality content that resonates with your audience. Whether you opt for a USB microphone like the Blue Yeti or a professional-grade XLR microphone like the Shure SM7B, investing in a good microphone can elevate the sound quality of your podcasts and help you stand out in a crowded market. Remember to consider factors such as pickup pattern, frequency response, and connectivity when selecting a microphone for your podcasting setup. Happy podcasting!

Creating Valuable Content for Videographers on YouTube

In the competitive world of videography, showcasing your skills and expertise is crucial for attracting potential clients and growing your business. One of the most effective ways to do this is by creating and publishing videos on YouTube. But with so much content out there, how can you make sure your videos stand out and provide value to your audience of fellow videographers? In this post, we’ll discuss the types of videos you should be publishing to YouTube to establish yourself as a professional in the field.

Educational Tutorials

One of the best ways to showcase your expertise as a videographer is by creating educational tutorials. Whether you’re demonstrating how to set up lighting for a shoot, edit footage in post-production, or use different camera angles for storytelling, sharing your knowledge and skills with others can help establish you as a go-to resource in the industry. Make sure your tutorials are clear, concise, and easy to follow, so that viewers can learn and apply your tips and techniques to their own work.

Behind-the-Scenes Footage

Another type of video that can provide value to your audience is behind-the-scenes footage of your shoots. This not only gives viewers a glimpse into your creative process and the work that goes into producing a professional video, but it also helps build a connection with your audience. By showing the challenges and triumphs of your projects, you can humanize your brand and establish a sense of authenticity that resonates with viewers.

Equipment Reviews and Recommendations

As a videographer, you likely have a wealth of knowledge about different cameras, lenses, lighting equipment, and editing software. Sharing your expertise through equipment reviews and recommendations can help fellow videographers make informed decisions when purchasing gear for their own projects. Be honest in your evaluations, highlight the features that are most important to videographers, and offer practical advice on how to get the most out of the equipment you’re reviewing.

Collaborations with Other Videographers

Collaborating with other videographers can not only expand your network and reach a wider audience but also provide valuable insights and perspectives that can benefit your viewers. By working with others in the industry, you can learn new techniques, share different creative approaches, and showcase the diversity of talent within the videography community. Collaborations also demonstrate your willingness to collaborate and connect with others, which can be attractive to potential clients looking for a videographer who is a team player.

Conclusion

In conclusion, when it comes to creating valuable content for videographers on YouTube, focus on educational tutorials, behind-the-scenes footage, equipment reviews, and collaborations with other videographers. By sharing your knowledge, skills, and experiences with your audience, you can establish yourself as a professional in the field, attract potential clients, and grow your videography business. Remember to prioritize quality content, engage with your audience, and stay consistent in your posting schedule to maximize the impact of your videos.